Friday, December 11, 2009
Almond Delight
This is a crunchy, heart-healthy snack to have around at holiday time when we all feel like snacking on something a little sweet. Great to have out at that family get-together for a healthier treat or to pack into a tin as a gift.
4 cups whole almonds
1 egg white
1/3 cup granulated sugar
1/3 cup dark brown sugar, packed
2 tbsp vanilla
1/2 tsp ground cinnamon
1 tsp salt
Toast almonds at 350 degrees for 8-10 minutes. Cool almonds and reduce temperature of oven to 300 degrees. Grease two large pans generously with butter, oil, or cooking spray. Whisk egg white until foamy, add sugars, vanilla, cinnamon, and salt. Continue whisking until combined. Stir in almonds; toss until well coated. Divide nuts between pans, spreading them into a single layer. Bake 10 minutes and then stir to separate almonds that may become stuck together. Bake another 10-12 minutes until nuts are a pale golden brown and appear to have dried out. Remove from oven and let sit 3-5 minutes. As nuts begin to harden, loosen them from the pan with a metal spatula and spread out on waxed paper to finish cooling. When cool, break into individual pieces or small clusters. Store in airtight container up to 1 week.
Oat-Rageous Chocolate Chip Cookies
Make this recipe into traditional cookies or spread into a glass baking dish for a quicker and easier treat.
1/2 cup butter
1/2 cup peanut butter (creamy or chunky)
1/2 cup sugar
1/3 cup packed brown sugar
1 egg
1/2 tsp vanilla
1 cup flour
1/2 cup quick cooking oats
1 tsp baking soda
1/4 tsp salt
1 cup semi-sweet chocolate chips
Cream butter, peanut butter, and sugars together. Beat in the egg and vanilla. Combine flour, oats, baking soda, and salt. Add to creamed mixture and mix well. Stir in the chocolate chips. Bake at 350 degrees for 10-12 minutes for teaspoon sized cookies or about 30 minutes for bars.
Good for you Fudge
I came across this recipe in the "Whole Earth Cookbook" quite a few years ago and have made it a few times. This year when making it I used chocolate in the recipe instead of the carob powder they called for and we really enjoyed it a lot. The chocolate helps to make the consistency a little nicer and firms it up more than the original recipe. If you don't like the seeds you could used any type of nuts instead.
1 cup honey
1 cup natural peanut butter
1 package 60% cocoa chips
1 cup sesame seeds
1 cup sunflower seeds
1/2 cup shredded, unsweetened coconut (optional)
1/2 cup chopped dates or other dried fruit
Melt the honey, peanut butter, and chocolate chips together in a saucepan until chocolate is melted, stirring to combine. Quickly add the seeds, coconut, and fruit, stirring to mix completely. Pour into a rectangle baking dish and refrigerate to harden. Cut into squares and enjoy. Refrigerate for better keeping.
Friday, November 20, 2009
Cheesy Garlic Popcorn
Here's a healthy snack that will cure your craving for a crunchy snack, boost your immunity, and is super easy to make. It's also very inexpensive if you own an air popcorn popper and buy the popcorn in bulk.
1/4 cup popcorn kernels, popped (you could use plain microwave popcorn or local corn grown and dried for popping)
4-6 cloves garlic, pressed
1/4 cup olive oil
Salt
1/2 grated hard cheese such as Asiago, Parmesan, Romano
In a small bowl combine olive oil and garlic. Heat for approximately 30 seconds in the microwave or until oil is bubbling. Spoon hot olive oil over popcorn, stirring. Salt to taste, add cheese and stir. That's it! Enjoy.
Friday, October 30, 2009
Butternut Squash & Rice Gratin
1 cup brown or white rice
1 tbsp butter or olive oil
2 tsp crumbled dried sage
2-3 cups coarsely grated butternut squash or other winter squash
salt and pepper
2 garlic cloves
1/4 cup chopped parsley
1/2 cup grated Gruyere or Fontina cheese
Bechamel Sauce
1/4 cup minced shallot or onion
1 1/2 cups milk
1 tbsp butter
1 tbsp cornstarch
1/2 tsp nutmeg
salt and pepper
Cook the shallot in the butter in a small saucepan over low heat until soft. Pour in milk and heat. In a small bowl mix cornstarch with 1 tbsp water and stir until smooth. Just before milk is at the boiling point, whisk in the cornstarch slurry and continue whisking until mixture boils and is thickened. Turn off heat and season with nutmeg, and salt and pepper to taste.
For the Casserole:
Make the rice (unless using leftovers) and the sauce. Heat the butter with the sage in a large skillet over medium-high heat. Add the squash, 1/2 tsp salt, and saute until the squash begins to brown in places, about 8 minutes. Toward the end, stir in the garlic and parsley. Combine the rice, sauce, squash and cheese. Season to taste with salt and pepper. Turn into a casserole dish and bake at 400 degrees until hot and beginning to form a crust on top, about 30 minutes
Friday, October 23, 2009
Homemade Veggie Dip
Today I had a craving for French onion dip and chips. I looked in my cupboard and found that I no longer had a stash of Lipton French onion dip mix. Instead of giving up on my craving I got out the nonfat plain yogurt and a little mayonnaise and put together a yummy onion and vegetable dip that is a healthier version of the old favorite. It contains plenty of onions which contain quercetin, a natural antihistamine, great for helping to fight off those nasty colds this time of the year.
1 cup nonfat plain yogurt
1/4 cup mayonnaise
1 tsp garlic powder
salt to taste
1/2 cup finely chopped red onions
1/2 cup finely chopped carrot
1/4 cup finely chopped celery
Chopped parsley or chives (optional)
Stir mayonnaise and yogurt together until smooth. Salt this mixture to suit your taste and then add the garlic powder stirring thoroughly. Incorporate the vegetables and herbs, if using. Chill in the refrigerator until ready to serve or enjoy some immediately. Serve with vegetable chips or baked potato chips.
Monday, October 12, 2009
Butternut Squash, Carmelized Onion & Apple Bake
1 large butternut squash, peeled, cut into large pieces
2 large onions, peeled, sliced thin
6-8 apples, peeled, sliced thin
1/4 cup butter and/or olive oil, melted
In a large bowl toss the squash with enough of the melted butter or oil (or a mixture of the two) to coat. Place squash in a glass baking dish and roast in oven at 450 degrees, stirring about every 10-15 minutes or so until squash is soft. Heat a large frying pan over high heat, add about 2 tbsp butter or oil (butter works best for caramelizing onions) and add sliced onions. Cover the pan for about 10 minutes to soften then remove, stir and turn down the heat to med-low. Continue to cook onions, stirring every few minutes, until they are lightly browned and caramelized, about 30 minutes or so. At this point, turn up the heat and add the apple slices to the pan with the onions, combining. Cook on high heat, stirring constantly, until apples have browned and are soft. When squash is done roasting, add the apples and onions to the glass baking dish, stir to combine, and season with salt. Cover and place back in oven at 350 until ready to serve. Also can be frozen to enjoy at a later time.
This recipe is also great mixed together with pasta and a white sauce:
1 1/2 tbsp butter or margarine
1 tbsp cornstarch
1 cup milk
1/2 tsp salt
1/8 tsp pepper
Or it can be blended with chicken stock to make a yummy butternut squash soup!
1 quart chicken stock, heated
dash cayenne pepper
2-3 tbsp heavy cream, optional
Combine heated stock with butternut squash/apple/onion mixture and ladle into blender. Blend until smooth and transfer into a pot. Heat and season if desired with cayenne pepper and a few tablespoons heavy cream. This soup freezes very well.
Friday, October 2, 2009
Spring Roll Filling
1 tsp chili oil (more or less depending on how spicy you want it)
2 tsp olive oil or sesame oil
1 large onion, chopped
1/2 head thinly sliced cabbage
2 large carrots, shredded
1/4 cup soy sauce
1 tbsp rice wine vinegar
1/4 cup water
1/2 cup chopped scallions
3-4 cloves garlic
1 tsp fresh grated ginger
In a large frying pan, heat oil and saute onions, stirring, until they start to brown. Add cabbage and carrots to pan along with soy sauce, vinegar, and water. Cover and turn heat to medium allowing vegetables to soften for about 10 minutes, stirring occasionally. At this point add the garlic, ginger, and scallions stirring them in, leaving the pan uncovered allowing the liquid to reduce. When liquid is reduced and pan is just about dry taste for seasonings adding salt and pepper if desired. This is a basic filling for spring rolls and can be frozen at this point. Tofu, baby shrimp, shredded chicken, bamboo shoots, sauteed mushrooms and bean sprouts could also be added just before filling the rolls. Follow spring roll wrapper package directions for softening, rolling, frying (if desired).
To make dipping sauce:
1/4 cup soy sauce
1/4 cup rice wine vinegar
2 cloves pressed garlic
pinch red pepper flakes, optional
Mix all ingredients in a pan and heat gently until it just starts to simmer. Turn off heat and let sauce sit about 10 minutes or so. If a thicker sauce is preferred, add 1 tbsp cornstarch, mixed with enough water to make a smooth slurry, to the pan just before it starts to simmer. Whisk constantly, while mixture is simmering, until thick. Remove from heat and cool. Just before serving sesame seeds or fresh sliced or chopped scallions can be added.
Monday, September 28, 2009
Grilled Chicken, Chick Pea, and Feta Salad with Curry Dressing
Salad greens are one of the vegetables that do very well in the cooler fall weather. Whenever we have lots of salad greens we make this recipe for dinner; it is a favorite in our household. Serve with garlic bread and/or soup.
Salad greens-enough for how ever many people you are serving
Grilled chicken, sliced (figure a little less than 1 chicken breast per person, less for children, or leave out the chicken for a delicious vegetarian main dish)
1 can chickpeas, drained
Feta cheese, crumbled
Curry Dressing
3/4 cup olive oil1/4 cup apple cider vinegar
1/4 cup lemon juice
2 tbsp sugar
1 tsp granulated garlic
1 tsp salt
1 tbsp Dijon mustard
2 tsp curry powder
Add all ingredients to a large jar with a lid. Tighten lid and shake until all ingredients are blended together.
In a large salad bowl toss greens with enough dressing to coat the greens. Top greens with feta cheese, garbanzo beans, and grilled chicken. Cucumbers, sprouts, and tomatoes also go well with this salad. You can dress individual servings of salad in case all the salad doesn't get eaten. Dressing stores in the refrigerator for several months.
Monday, September 21, 2009
Creamy Cauliflower & Kale Soup
1 quart stock (chicken or vegetable)
1 small head cauliflower, cut into large florets
1 fennel bulb (optional), cut into large piece
1 quart skim milk
3 tbsp cornstarch
1-2 cups shredded cheddar cheese, low fat if desired
2 cups chopped kale
1 tbsp fresh chopped dill
1/2 tsp granulated garlic
salt and pepper to taste
In a large pot heat stock, cauliflower, and fennel, if using. Boil cauliflower in stock until tender. Remove cauliflower from stock and place in food processor fitted with blade attachment or blender and process until smooth. Return processed cauliflower to stock and combine. Stir cornstarch into cold milk and then add milk to the stock mixture. Add kale and bring soup to a boil stirring until soup thickens. After it has come to a simmer, turn the heat down and cover for 10-15 minutes to cook the kale. When kale is tender stir in the cheese and season with dill, garlic, salt and pepper.
Friday, September 18, 2009
Vegetable Pancakes
Making pancakes out of vegetables is a fun way to get your children to eat vegetables. Pancakes can be made from all kinds of vegetables such as carrots, parsnips, sweet potatoes, corn, spinach and other greens, and squash. The basic recipe for using any of these vegetables in pancakes is 4 eggs, 2 cups of veggies (shredded works best for the harder ones, greens should be cooked and chopped) about a cup of flour or more to make the batter thick enough, seasonings such as herbs, salt, pepper, onions, or garlic powder, and lastly oil for frying the pancakes. The following recipe is a different variation of a vegetable pancake that uses corn as the main vegetable, but could be replaced by any of the aforementioned vegetables.
Corn and Cornmeal Pancakes
2 cups corn kernels ( if frozen, thaw a little) pulsed in food processor 10-12 times or chopped with a knife until coarsely chopped
4 large eggs
1/2 cup yogurt
1/2 cup silken tofu
1/4 cup minced onion or 1/2 cup scallions thinly sliced
1/4 tsp Tabasco sauce
1 cup cornmeal
1/2 cup flour
1 tsp baking powder
1 tsp sugar
1 tsp salt
chopped parsley and/or diced red peppers can be added for color but are not necessary
Put corn in to a big bowl; add ingredients up to Tabasco sauce and mix. Add dry ingredients and stir until moistened. Pour small amount of oil on a hot pan and spoon scant 1/4 cup batter and brown on both sides.
Monday, September 14, 2009
Local Food All Year Long
One of the easiest ways to preserve the harvest and enjoy some local food all year long is to freeze fresh corn and other vegetables.
One rainy August day last year we bought 1 bushel of fresh corn at the local farmer’s market. The kids and my husband shucked it outside on the deck in their raincoats and hats, and proudly brought it to me in the kitchen. I then cut it off the cob, blanched it, and froze it. This produced two 1-gallon zip lock bags full of fresh corn once it was frozen, enough to last us all year. That was for a 4-person household who uses corn about 2 times a month. You can do more or less depending on how many people you are serving and how much you eat corn. Sometimes you just have to guess and keep notes of how much you used and when you ran out so that you can adjust the quantity for next year.
To cut fresh corn off the cob, after shucking, place larger end of corn in a large bowl and hold onto the pointier end firmly. Using a sharp knife, cut from the end you are holding down to the bottom and repeat turning the corn as you go. The kernels of corn should pop off quite easily but you do want to make sure that you are getting enough of the kernel off the cob.
After cutting all the corn off the cob, place corn in a large pot of boiling water and bring the water back to a boil for just a minute or 2. If you don’t have a very large pot you can just cook the corn in a smaller pot in batches. Drain the corn in a colander, letting it sit for 10 minutes or so to drain fully. Line cookie sheets with clean towels and spread corn out onto the towels. Let the corn sit on the towels for an hour or so to dry them as much as possible and then remove the towels leaving the corn on the cookie sheets. Now you can freeze the corn and when it is frozen you can easily transfer it to a gallon zip lock bag and the kernels should not be stuck together. When you are ready to use some corn you just take out the desired amount and reseal the bag.
You can also use this same technique of preparing vegetables, blanching, drying, and freezing in bags to preserve green beans, wax beans, spinach, kale, cauliflower, and broccoli. The trick is to make sure the vegetables are as close to completely dry as possible before freezing.
Thursday, September 10, 2009
Spicy Peanut Rice Noodles
1 package wide rice noodles (Pad Thai noodles)
1/2 cup natural peanut butter
1/4 cup low sodium soy sauce
1/4 cup rice wine vinegar
1/4 cup water
Dash Chile oil
Cook noodles according to package directions. Heat peanut butter in microwave or in a saucepan on stove and stir in soy sauce, vinegar, and water until mixed. Season with Chile oil according to how spicy you want the noodles. Pour sauce over noodles and mix thoroughly. Eat right away!!! Serve with Teriyaki Pork Tenderloin or stir fried vegetables/meat.
Thursday, September 3, 2009
Quinoa, Black Bean & Corn Salad
Quinoa (keen-wah) is a food that many people are not accustomed to eating, but which is very desirable because of all the health benefits. Quinoa is high in fiber and has all of the essential amino acids present, making it a complete protein. It is also high in the mineral magnesium and vitamin B2. Quinoa is a must for someone who is vegan and a plus for a vegetarian. Quinoa is also gluten free and thus can be consumed by those with celiac disease. Quinoa can be used plain as a side dish, mixed with rice, or used as a substitute for other grains in some recipes. Before cooking quinoa it is necessary to rinse it in a fine sieve under warm water to remove the natural bitter tasting saponins from the outside of the seed. The following recipe uses quinoa along with the ever-healthy black bean.
1/2 cup red wine vinegar
4 tbsp olive oil
1 tbsp lemon juice
2 clove garlic, minced
1 tbsp sugar
1/4 tsp salt
1 tsp cumin
1 tsp chili powder
1/4 cup of your favorite salsa
1 can black beans, drained & rinsed
1 cup fresh corn (about 3 ears), cooked
1/4 cup red onion, diced small
1 cup chopped red bell pepper
¼ cup chopped scallions
1 cup quinoa
Rinse quinoa in a sieve and place in a pot with 2 cups water. Bring to a boil and turn heat to simmer. After the quinoa simmers for about 10 minutes add the corn off the cob into the pot. Cover and continue to cook until all of the water is absorbed.
Whisk together the vinegar, olive oil, lemon juice, garlic, and sugar. Combine the cooked quinoa, corn, beans, peppers, and scallions and toss with the dressing. Season with salt and pepper to taste.
Monday, August 31, 2009
Ratatouille
Ratatouille is so easy to make this time of year when most people have all the vegetables and herbs growing in their garden or can get them fresh at the farmer's market. Yesterday I made ratatouille and told at least 3 people what I made and none of them knew what it was. If you like eggplant, zucchini, peppers, onions, and tomatoes you will love this dish. For some protein as a vegetarian meal I would reccomend adding chickpeas to the ratatouille.
1-2 large onions, sliced thin
2-4 peppers, depending on size, red & green, diced large
1 medium zucchini, diced large
1 eggplant, peeled, diced large
5 large cloves garlic, chopped or pressed
about 8 fresh tomatoes, peeled and diced large (or a can of diced tomatoes if fresh are not available)
1/2 cup fresh basil, chopped
1 tbsp fresh thyme, or 1 tsp dried
1/2 tsp oregano
To slice onions, peel, and cut in half at the root end. Place flat side down on cutting board and slice. This way the onion won't roll about.
To peel fresh tomatoes, boil a small pot of water. Cut out the stem of the tomato and score the bottom with a paring knife making an x. When water boils drop tomatoes in one at a time for 30 seconds or so. Remove tomato with a slotted spoon to a colander and let cool. When cool, remove skin and dice.
Heat a large pot or dutch oven, add 2-3 tbsp olive oil, let heat, then add onions and cook until soft. Add diced peppers, zucchini, and eggplant and stir to combine. Cook on high heat until heated through, stirring every few minutes. Add diced tomatoes, bring to a simmer, lower heat, cover and cook about 15-20 minutes until tomatoes have broken up. Uncover and simmer to reduce liquid, add garlic, herbs, and season with salt and pepper. Eat the Ratatouille alone or served over rice or pasta.
Teriyaki Pork Tenderloin
4 tbsp soy sauce
1 clove garlic, minced
1/2 tsp freshly ground pepper
2 tsp brown sugar
2 tbsp olive oil
1 tsp ground ginger, or freshly grated ginger if available!
Combine marinade ingredients and pour over tenderloin. Let this sit, refridgerated, for several hours or overnight. Grill or bake tenderloin until internal temperature reaches 145 degrees. Let the meat rest for about 10 minutes on cutting board before slicing. Serve with Nastirtium Flower Salad or rice and vegetables.
Nasturtium Flower Salad
This is the first year that we have enjoyed the benefits of growing Nasturtiums. Although they do tend to take over the garden and you have to control their growth, they are helpful in keeping some of those pests away from the vegetables. As a companion plant they should be grown around cabbages, broccoil, melons, cucumbers, pumpkins, potatoes, and around fruit trees to discourage aphids, white fly, and root pests.
These beautiful edible flowers are high in antioxidants, vitamin C, and have antibiotic properties. While they are not real tasty by themselves (bland with a little spicy aftertaste) they are delicious and beautiful in a salad, on a cake, or in cream cheese or pesto.
Dressing for Salad:
1/4 cup red wine vinegar
1/4 cup olive oil
1/4 chopped scallions
1/4 cup chopped red onion
2 garlic cloves, peeled
1 tbsp sugar
salt and pepper to taste
2 tbsp soy sauce
Place all ingredients in a blender or food processor and process until smooth.
Pick the desired amount of flowers. Fill a large bowl with water and place flowers in water gently rinsing them, taking them out one by one and placing in a salad spinner. When all the flowers are washed, spin out the water. Using kitchen shears, cut off the petals just above where they attach to the stem leaving behind the tougher bottom of the flower. Wash some romaine or other type of lettuce ( a firm lettuce will work better to keep the shape of the salad because the petals will shrink down) and using a chefs knife, chiffonade. Toss dressing with lettuce a little at a time until coated. Depending on the amount of salad you are using you should have some dressing left over. Now toss in flower petals and sprinkle with toasted sesame seeds if desired. To toast seeds put a little olive oil in a pan with seeds and cook over medium heat stirring constantly. They will burn easily and brown fast. Serve with Teriyaki Marinated Pork Tenderloin, if desired.
Sunday, August 30, 2009
Zucchini Oatmeal Muffins (or Bread)
This is the best Zucchini Bread recipe I have ever come across. It has healthful elements besides the zucchini and it freezes well. I have made multipule recipes when I have lots of zucchini's in the summer, freeze them, and take them out for breakfasts in the winter. Kids love this bread!
2 cups flour
1/2 cup whole wheat flour
1 1/2 cup sugar
1/2 cup quick cooking oats
1 tbsp baking powder
1 tsp salt (can be reduced or omited)
1 tsp cinnamon
1 cup chopped pecans or walnuts (optional)
4 eggs
1 medium zucchini, shredded (cut out large seeds)
3/4 cup salad oil
Preheat oven to 400 degrees for muffins or 350 degrees for bread. Grease muffin tins or bread pan. In a large bowl combine first 7 ingredients. In medium bowl beat eggs and stir in oil and zucchini. Stir egg mixture into flour mixture until just moistened (will be a little lumpy). Spoon into baking pan or tins. Bake muffins 25 minutes, bread about 1 hour, or until a toothpick comes out clean. Cool on wire rack. Enjoy!
Friday, August 28, 2009
Flourless Chocolate Hazelnut Cake
For those who have to avoid wheat it can be frustrating to bake a cake. This cake recipe is so good you will never know that it is gluten-free.
10 oz bittersweet chocolate - melted
12 tbsp butter (smart balance works too!)
6 eggs,separated
1/2 cup brown sugar
1/2 cup plain nonfat yogurt
2 1/2 cups ground hazelnuts (you can use almonds or 1/2 hazelnuts & 1/2 almonds)
Melt butter with the chocolate. Beat yolks and sugar until thick and creamy. Stir in the yogurt and nuts and then the chocolate/butter mixture. Beat egg whites and fold into batter.
This recipe calls for a 10" springform pan but since it is such a delicate cake I would recommend 2 well buttered 8" cake pans. This way you can put a little frosting in the middle and have a layer cake.
Bake at 350 degrees until firm to the touch and cake tester comes out clean. This is a very moist cake so when tested there may be a little cake stuck to the tester.
For the topping: To a 1/2 stick butter, softened, beat in 4 oz semisweet melted chocolate. Spread on cake when completely cooled.
Strawberry Season
It’s Tuesday, June 23, the height of strawberry season, and we are finally rewarded with a sunny day for picking after a weekend of heavy rains. My daughters and I are headed to the local “pick your own” farm to gather our year’s worth of the delicacy. This is an annual tradition for us that has become even more important to us in recent years as we have committed to eating as much local food as possible. My older daughter is 10 and has matured into a fine strawberry picker instead of just a strawberry eater, making my job much easier.
The scorching sun is on my back as I kneel in between the rows of vegetation, being careful not to land my knee on a fallen strawberry. The quarts fill quickly and easily as I enjoy some much-needed conversation with a friend who has met us here. There are many good specimens to choose from; we make sure to pick ones that are ripe but not mushy and always inspect them for insect damage. I do not begrudge the insects their taste of the red sugary fruit, but am careful to leave them in the field with their half eaten meal.
My 4 year old wanders around eating her share of the hot sweet berry. I take my first sample after picking for a while, waiting for the one that I cannot resist. It is the perfect strawberry, shaped just right and bulging with ripe juice. I bite slowly into the succulent berry leaving only the stem in my fingers. I flick the stem into the next row as the strawberry melts in my mouth. It is warm from the sun and sweet on my tongue, making the saliva rush into my mouth from the glands, disintegrating with the slightest pressure. This is how they are to be eaten, hot from the field, but we only get this pleasure once a year.
“I filled another one Mom.” Olivia’s voice gently pulls me out of my strawberry induced trance. What help she is now, unlike Sylvia who’s tummy is full and who is insisting that I eat the berries she’s picked just for me, making sure that I am eating my share. We have soon picked all we need and start helping fill my friend’s basket, as she doesn’t have a helper yet. Her son is only 2, and he is delighting in the feeling of squishing the hot juicy berries in his hands. She tries to give him ones that the insects had for their lunch so that the perfect ones don’t end up on the palm of his hand or running down his leg.
On the ride home we feel full of more than just berries; we have accomplished much…16 quarts of strawberries in a little over an hour and a half. On the way home we also stop at another farm to buy fresh local whipping cream. At home I stir up some biscuits, and we are tempted to skip dinner and just eat the fresh strawberry shortcake as our meal. At the end of the day, 8 quarts of fresh strawberries are chilling in the freezer getting ready to provide us with their fresh taste for our smoothies or on our waffles this fall, winter, and into the spring. With the rest of the berries we will make jam, strawberry sorbet, and eat as many as possible while they are fresh.
Wednesday, August 26, 2009
Dinner from the Garden
Growing peppers, zucchini's, tomatoes, and onions this year? Maybe you also have some local garlic that you grew or bought at the farmer's market! This Mexican Stuffed Pepper recipe is an original from my kitchen and uses mostly vegetables that you have in your garden or can get at a farmer's market. The filling is as easy to make as it is to eat.
1/2 cup chopped onions
1 tbsp olive oil
2 cloves garlic, chopped
1 lb ground beef
1 cup cooked rice
1 cup diced tomatoes
1 cup finely shredded zucchini
1 tsp cumin
1 tbsp chili powder
dash of cayenne pepper
salt and pepper to taste
5-7 peppers, depending on size and shape
1 cup shredded cheddar cheese
Heat a large skillet over high heat, add olive oil and onions and saute for about 5 minutes. Add ground beef and cook until browned. Add garlic, rice, vegetables, and seasonings. Cover and simmer until liquid from vegetables is all absorbed, stirring every minute or so. Taste for seasonings and add more to your liking. Wash peppers and cut them in half, removing the stem and seeds. Place in a baking dish, spoon filling into each pepper half and sprinkle with cheese. Bake at 350 degrees for about 30 minutes or until the peppers are soft.
Subscribe to:
Posts (Atom)
About Me

- Jessica
- With a degree in Restaurant Managment and Nutrition and a background in and love of the culinary arts, Jess is able to whip up delicious yet nutritious meals. She gardens extensively and uses what she grows to feed her family not only during the summer and fall but throughout the winter and spring by preserving and freezing the fresh produce. She is committed to growing, buying, and eating as much local food as possible. She started this blog to spread information about eating locally and its benefits. She also wanted to have a forum to share the recipes she uses and the stories she writes. She would love the opportunity to be able to share this knowledge to increase the amount of people using local and organic products.
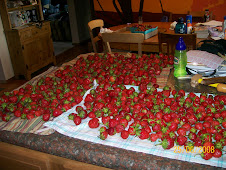
The fruits of our labor